On Saturday Nov. 28th, Georges Kesseler took it upon himself to hold the hackerspace’s first chocolate workshop. Georges graciously offered to teach us how to make silicone molds and then to use them to make chocolate parts. He uses this process to make the Keybites.
The genesis of the workshop was to make more chocolate keyboard molds so that Georges could make more chocolate keyboards, but Georges also encouraged participants to bring their own objects to make out of silicone.

Which is the machine that goes "ping"?
The day started off as some of our invitees discovered the various parts of the hackerspace. They were surprised to discover the chillroom and workroom, and some mentioned how the Syn2catʼs hackerspace was lightyears better (i.e. cleaner) than others theyʼd seen. Hackers take note!
As we started the workshop, Georges explained that there are many types of silicone, but that the important distinction was to make sure that the silicone is food-safe. This bears repeating. FOOD. SAFE. If itʼs not food safe, itʼs a non-starter. Hereʼs a website where you can get food-safe silicone in Europe.

Remember kids, when learning to juggle hazardous chemicals, always start with two bottles, never three.
This silicone comes in two parts, which allows for a longer shelf life and better curing process. The disadvantage is that you have to weigh and mix the silicon ahead of time. This particular silicone comes in a not-so-flattering fleshy pink color.

It's amazing that Han Solo survived carbonation. This keyboard sure didn't.
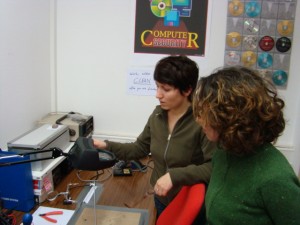
Georges showed how silicone gets everywhere. It pours on thick, but penetrates under every surface. Itʼs very important that the shape too be molded is lying flush with the supporting surface, and that there is no way for silicone to get underneath. Otherwise, problems will occur with quality, as Georges demonstrates with a keyboard. This was the first try to make a mold, and the silicone flowed underneath all the keys, making it impossible to release the mold, and additionally destroying the keyboard in the process.
Georges recommended using double-sided tape or a little dab of glue in order to seal the object to the working surface. If glue is to be used, care must be taken that the glue does not flow from underneath the object, otherwise the silicone will mold itself to the glue instead of the objectʼs edges. Georges wanted to make a third keyboard mold using his existing setup, but in addition he wanted to show how to create a mold from scratch. For this, he chose to use a simple 2€ coin.
 The secret to molding the silicone is to make a container that will keep the silicone in place while it is drying. The container should be slightly larger than the object to be molded, so that there is not much silicone waste. (At 40€/ kg, it pays to save!) Here, George simply tore up a small piece of cardboard cereal box, shaped it into a cylinder, and taped it shut with some duct tape.
 As the silicone flows everywhere, in spite of itʼs viscosity, the container needs to be sealed on the edges and on the bottom. This was done with the creative application of tape and white-glue.
After giving sufficient time for the glue to dry, everythingʼs ready for the next step: mixing and pouring.
Before pouring, Georges took a brief interlude to explain what would be going on.
First, the silicone comes in two parts, so it has to be mixed together. The quantities are quite specific, so care must be taken if the silicone is to cure properly. The silicone is a 1:1 mix, which means that one part of component A is mixed with 1 part of component B. This is done on a scale.
Second, once the two silicone components are touching each other together, the clock starts ticking. The silicone has a working life of only 4 minutes, so time is of essence. In those four minutes, the silicone components must be well-mixed together, and the entire pouring process must be finished.
Third, stirring with a popsicle stick is an imperfect process, and always leaves some unmixed silicone parts on the cup’s wall. This unmixed silicone will never cure and thus makes the mold unusable. By pouring the silicone from one cup to a second cup, any unmixed silicone lands in the center of this second cup. Here a little more stirring mixes in the last remnants.
Lastly, because the stirring process traps bubbles, bubbles which will cause mold imperfections or even failure, these bubbles have to be removed. One way to do this is by always pouring the silicone from a great height– 1.5m is enough– so that the stream thins itself out so much that bubbles are popped.
 A complementary strategy for eliminating bubbles is to recognize that bubbles tend to float upwards (albeit very slowly). Thus, we want the liquid silicone closest to the cup’s bottom to be the first to be poured on the mold. This is actually easier than it sounds: beforehand, just poke a hole into the bottom of the second cup; cover it over with tape; and remove the tape when ready to pour. The hole should be about the diameter of a pencil, otherwise it will pour too slowly (eating up valuable working time) or too quickly (not letting the stream be sufficiently thin to eliminate bubbles).
Once the silicone is poured, it is very important to remove any last bubbles that might have gotten trapped between the object and the silicone. This is done by agitating the mold at a high frequency. In this case, Georges used a heavy object to rap the edge of the wooden board that held the object to be molded.
After everything is done, and the mold has been thoroughly shaken, the work is done. In any case, after 240 seconds have passed, thereʼs nothing more to be done– that can be done– except wait 30 minutes.
 30 minutes later, once everything is dry, itʼs time to remove the cured silicone from the original object. This takes a fair amount of time, as the silicone will be nicely wedged into place. Some force is required in order to start the process.
Thereʼs no need to worry about ripping the silicone apart, the thick sections are quite strong and stretchy. Be careful about using a knife, though, as silicone is funny: a knife that is a tiny bit too dull won’t cut anything, but when the knife edge is sharp the silicone cuts very easily.

Georges drys the mold using a halogen lamp.
Once the silicone mold is done, on to the chocolate!
The first thing to know is that the mold must be cleaned and thoroughly dried. It is of the utmost importance that the mold be completely free of water, as the water will discolor the chocolate. Georges demonstrated how the mold can be speed dried with the infrared heat from a halogen spotlight.
Once the mold is ready, the chocolate can be prepared. The exact temperatures vary depending on the type of chocolate (white, milk, or dark), but the process is identical.

These crystals clearly came from the wrong side of the tracks.
The goal is to produce a tempered chocolate, which has all the features that make chocolate so beautiful and delicious. Chocolate can crystalize in 6 different ways, Georges explained, but only one brings out its best qualities.
As the process is very temperature dependent, a thermometer is absolutely essential. Digital thermometers are nice, and can double as a stirring stick, to boot.
 For dark chocolate, first the chocolate must be heated to above 45°C. Georges explained that above this temperature no crystals are left in the chocolate and thus it ready for proper seeding. However, great care must be taken not to heat the chocolate above 50°C, as this burns the cocoa butter and destroys the chocolate.
Second, the chocolate must be allowed to cool to just below 34°C. Once below 34°C, a seed crystal is added by taking existing tempered chocolate and adding it to the cooling chocolate. Once the chocolate is seeded, it needs to be heated up again to 33°C, but no warmer. If the chocolate reaches 34°C, it needs to be reseeded.
At this point, the chocolate is ready to be poured into the mold. As in the case of the silicone, bubbles that are trapped in the chocolate need to be eliminated. And, again, as in the case of the silicone, the bubbles can be removed by pouring from a high place. And, again, the bubbles are further removed by agitating the mold. 
Once the chocolate has been poured, it takes up to 3 hours to fully cool. If the chocolate is properly tempered, the surface glistens, and the chocolate will snap in a very satisfying manner. In order to verify that the chocolate is indeed properly tempered, a small glob of chocolate can be placed on a surface where it will rapidly cool. If the chocolate was not properly tempered, or any other defect has occurred, the chocolate can be remelted any number of times.
The finished product is truly a sight to see. A chocolate keyboard, keys and all!

Finished chocolate keyboard. Note how you can even see the individual letters.

A second shot: here you can really see the letters.

Notes aren't just for school, kids.
And if you want to do this at home, donʼt forget to take your notes!